Azure-API-Management-Deploy
이 글에서는 Azure API Management를 구축해보겠다.
API Management에서 APIs에서 미리 만들어둔 App Service를 browse하여 Api를 만든다
생성된 api의 test 탭에 들어가면
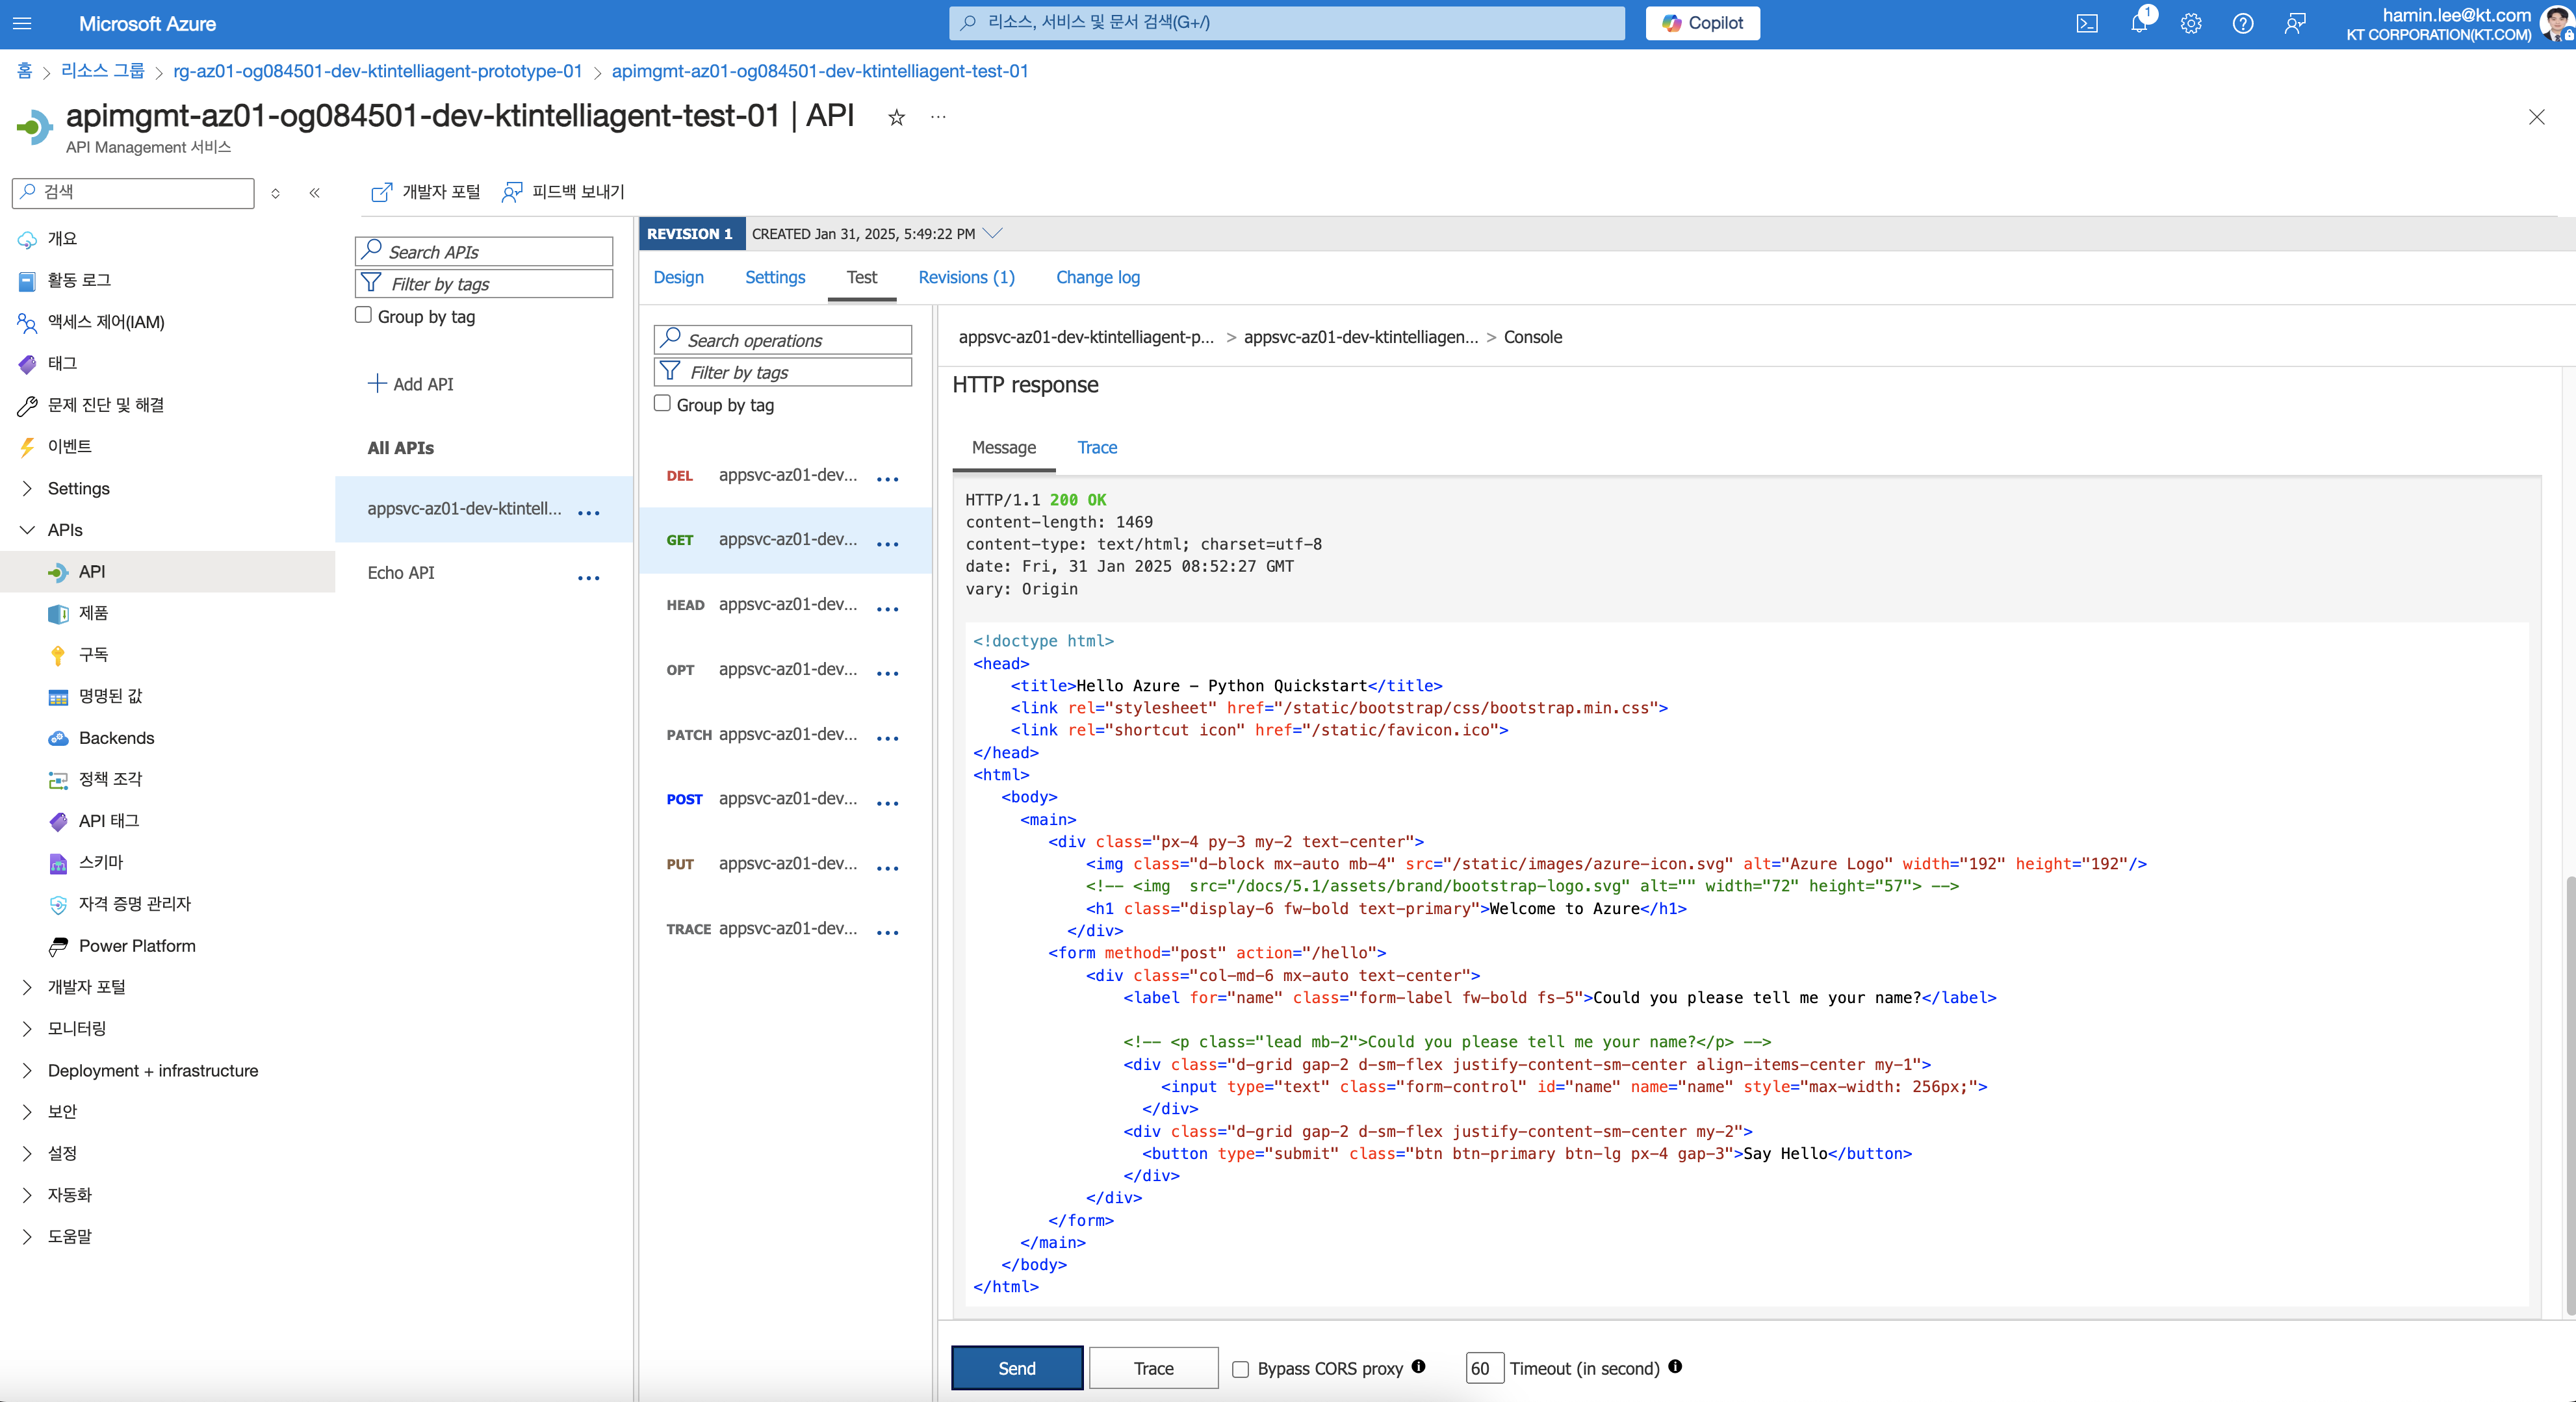
그냥 url 만 복사하여 요청하면
1 | curl --location 'https://apimgmt-az01-og084501-dev-ktintelliagent-test-01.azure-api.net/test20250131' |
아래와 같이 401 에러가 난다
1 | { |
- Ocp-Apim0Subscription-Key가 없어서 그렇다
Ocp-Apim-Subscription-Key
API Management의 규격이다
Header에 넣어주면 된다
Ocp-Apim-Trace:c도 넣어야 할까?
- APIs에 Subscription에 Built-in all-access subscription 항목에 있는 키를 가져오면 된다
- Pruduct(제품) 전용 키라고 생각하면 된다.
API Management에 GET
1 | curl --location 'https://apimgmt-az01-og084501-dev-ktintelliagent-test-01.azure-api.net/test20250131' \ |
API Management에 POST
1 | curl --location 'https://appsvc-az01-dev-ktintelliagent-prototype-01-daeya8a3dwdcegfs.koreacentral-01.azurewebsites.net/hello' \ |
- 위 헤더들에서 줄여서 아래처럼 보내도 무방하다
1 | curl --location 'https://appsvc-az01-dev-ktintelliagent-prototype-01-daeya8a3dwdcegfs.koreacentral-01.azurewebsites.net/hello' \ |
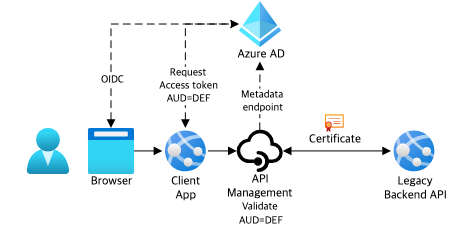
Azure API Management(APIM)에 OAuth2.0 인증 설정
1. API Management에 OAuth 2.0 인증 설정
Azure API Management에서 OAuth 2.0을 사용하여 액세스 토큰을 발급하고 API 요청을 인증하려면, 먼저 OAuth 2.0 제공자를 설정해야 합니다.
(1) Azure Active Directory (Azure AD)에서 App 등록
- Azure Portal에서 Azure Active Directory > 앱 등록 > 새 등록을 클릭
리디렉션 URI를 https://oauth.pstmn.io/v1/browser-callback 또는 API Management 엔드포인트로 설정애플리케이션(클라이언트) ID및디렉터리(테넌트) ID저장
(2) 클라이언트 자격 증명 생성
- 인증서 및 암호 > 새 클라이언트 암호 생성
- 생성된
클라이언트 암호 값저장
(3) API 권한 추가
- API 권한 > 권한 추가
- Microsoft Graph 또는 사용할 API 선택 >
Application permissions또는Delegated permissions선택 access_as_user또는 필요한 권한 부여
2. API Management에서 OAuth 2.0 제공자 등록
- Azure API Management 포털로 이동
- OAuth 2.0 인증 제공자 > 새 OAuth 2.0 제공자 추가
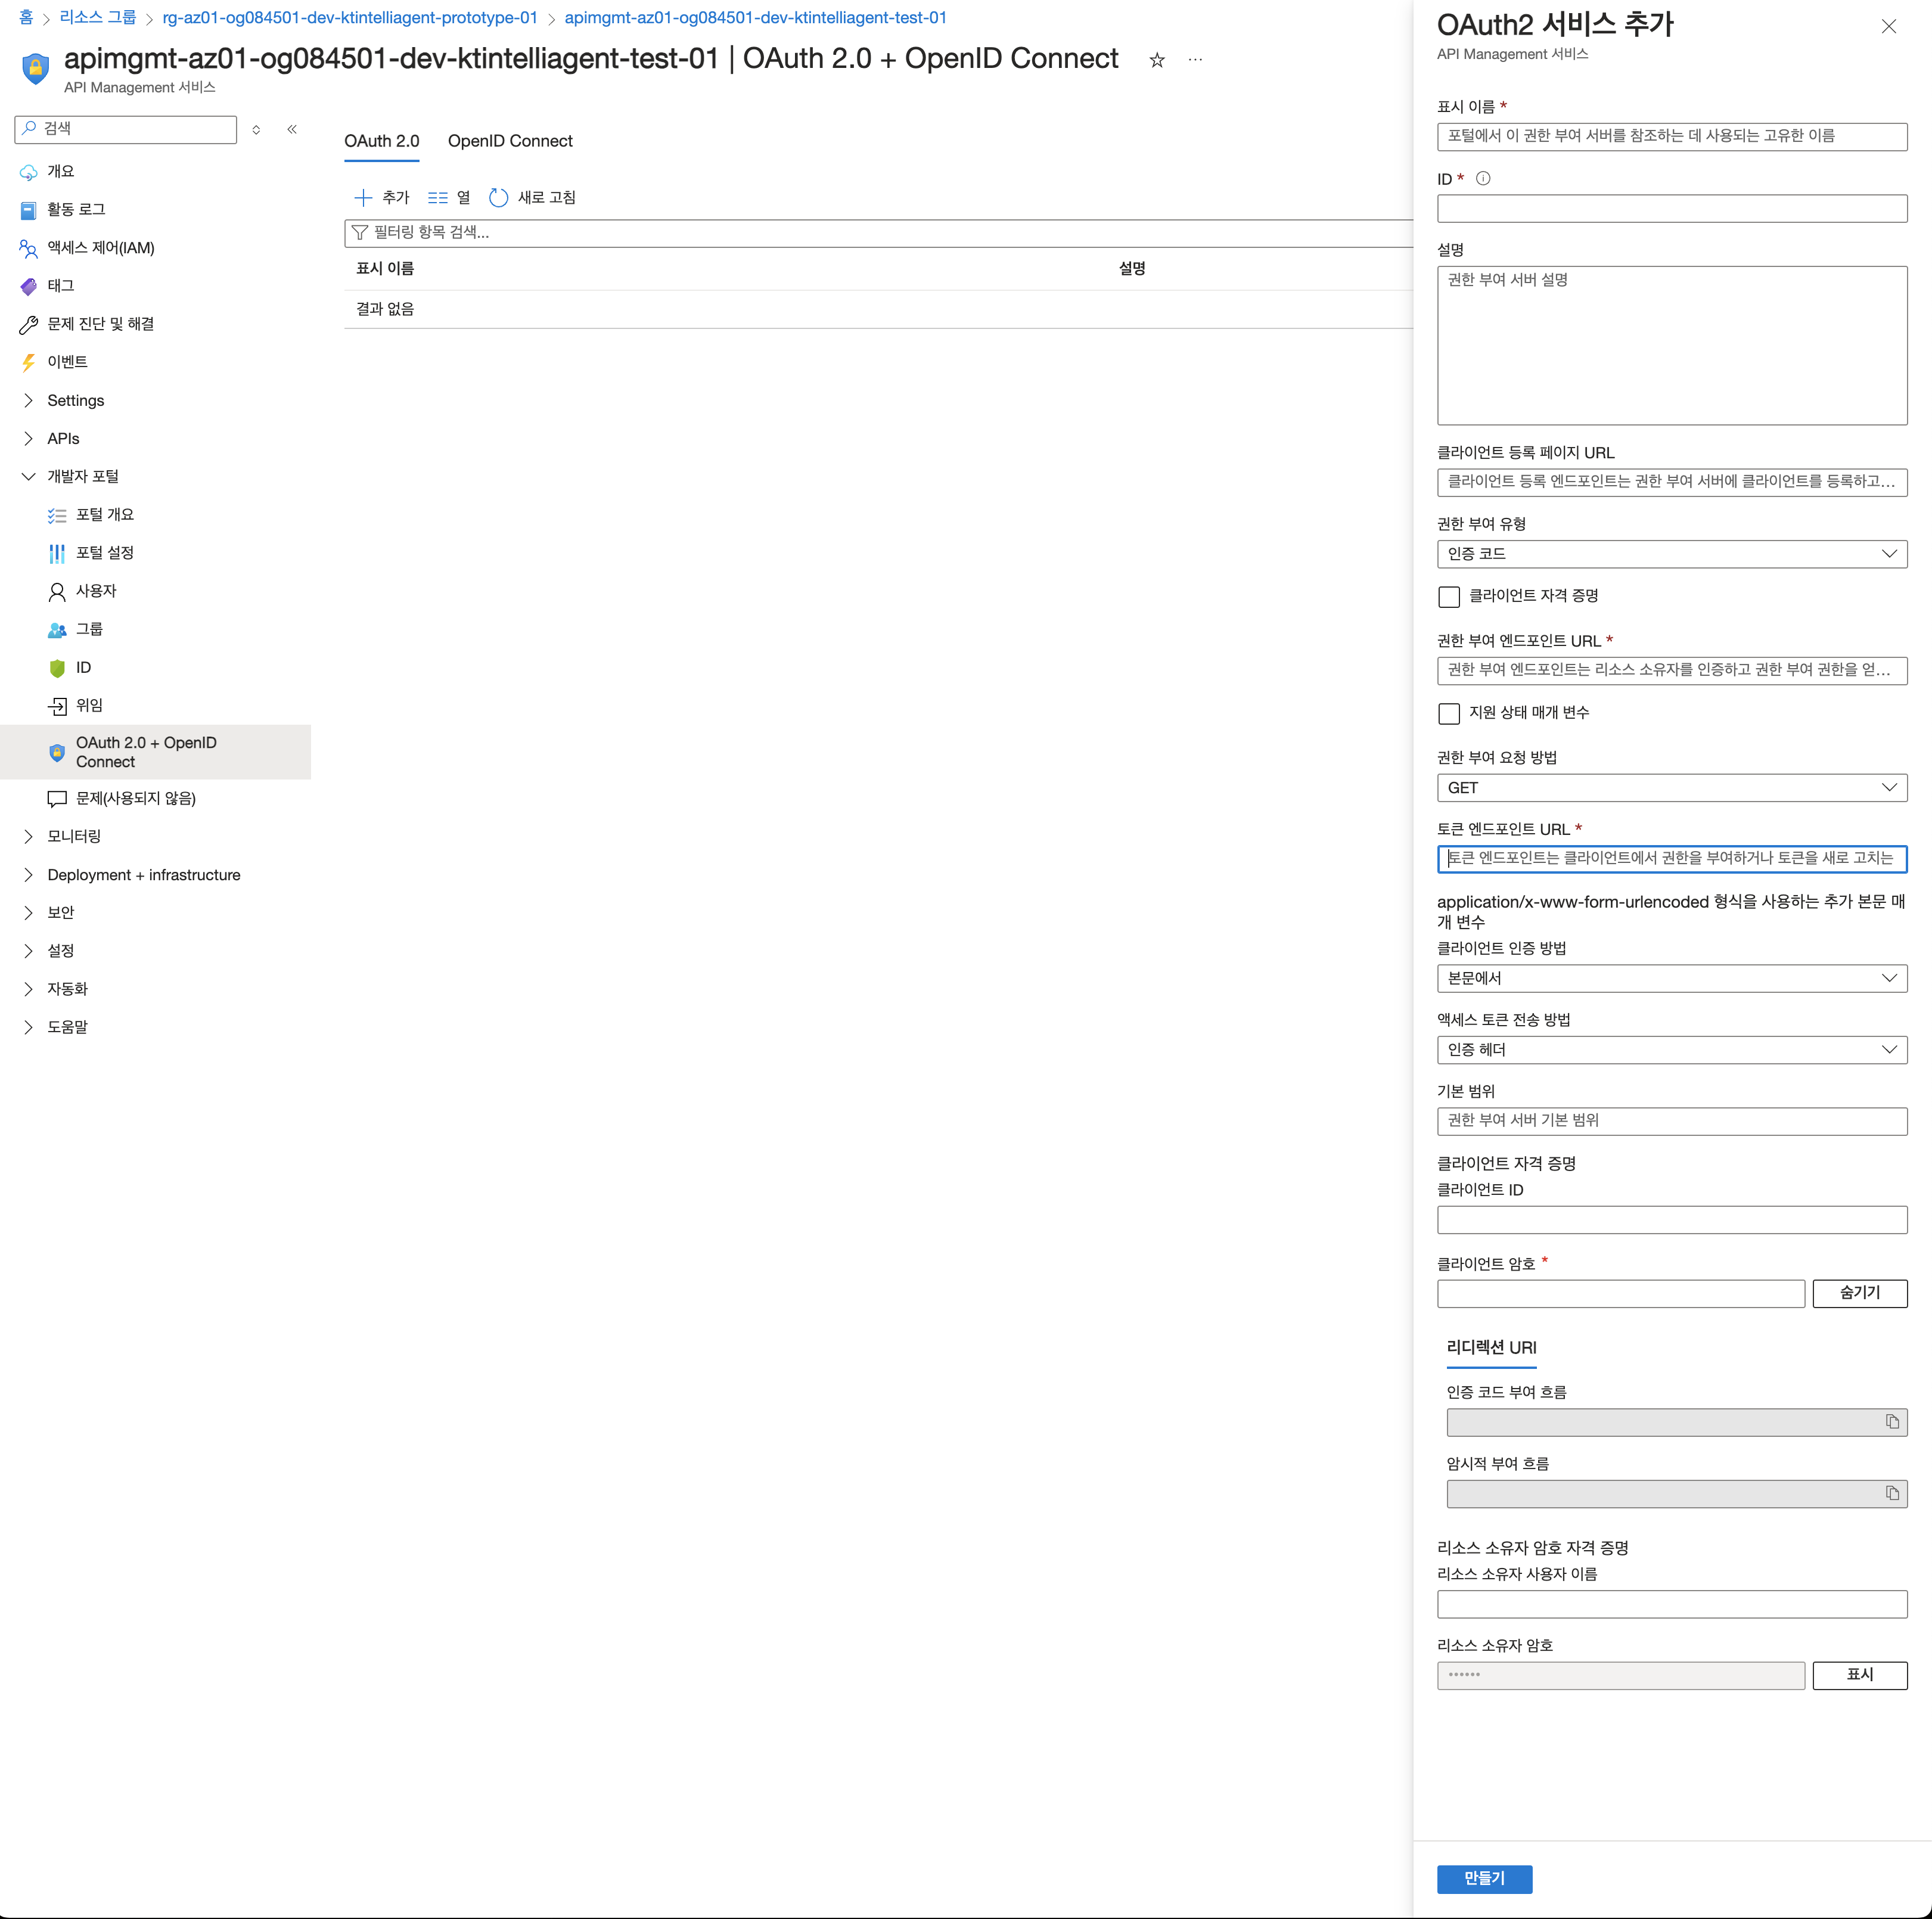
인증 엔드포인트 및 토큰 엔드포인트 입력
인증 엔드포인트:
1
https://login.microsoftonline.com/{tenant_id}/oauth2/v2.0/authorize
토큰 엔드포인트:
1
https://login.microsoftonline.com/{tenant_id}/oauth2/v2.0/token
클라이언트 ID 및 클라이언트 암호 입력
권한 부여 방식으로
Authorization Code또는Client Credentials선택
3. API Management 정책 설정 (액세스 토큰 인증)
API 요청이 들어올 때 액세스 토큰을 검증하는 정책을 설정해야 합니다.
(1) API Management 정책 추가
- Azure API Management > APIs > 대상 API 선택
- 정책 편집기(Inbound Processing)에서 다음 정책 추가
1 | <inbound> |
{tenant_id}: Azure AD 테넌트 IDYOUR-CLIENT-ID: 앱 등록한 클라이언트 ID
4. API 호출 테스트
액세스 토큰 발급 (OAuth 2.0
client_credentials사용)1
2
3curl -X POST "https://login.microsoftonline.com/{tenant_id}/oauth2/v2.0/token" \
-H "Content-Type: application/x-www-form-urlencoded" \
-d "grant_type=client_credentials&client_id={client_id}&client_secret={client_secret}&scope=api://{client_id}/.default"응답 받은 액세스 토큰을 사용하여 API 호출
1
2
curl -X GET "https://{api-management-endpoint}/api/resource" \
-H "Authorization: Bearer {access_token}"
Azure-API-Management-Deploy
https://hamin7.github.io/2025/01/21/Azure-API-Management-Deploy/
You need to set
install_url to use ShareThis. Please set it in _config.yml.